How to automatically run the Re-Initialize Visibility Meta button after every import using WP All Import

How to automatically run the Re-Initialize Visibility Meta button after every import using WP All Import

After importing your products using a third party plugin like WP All Import, your products are not re-saved in a traditional way like what is discussed in this article. If this happens, you just need to click the Re-initialize Product Visibility Meta on the Help tab of our Wholesale Price settings, to save the correct wholesale meta values in the database.
However, some customers update their products more often, usually via a scheduled import using a CRON job. It will be difficult for them to keep manually clicking this button each time they import their products. So the best workaround for this is to use the snippet below to automatically run the re-initialize button each time an import is made.
Please put this snippet on your theme/child theme』s functions.php:
function wwpp_product_visibility_fix() {
$wwpp = WooCommerceWholeSalePricesPremium::instance();
$wwpp_wholesale_roles = WWPP_Wholesale_Roles::instance();
$wwpp_wholesale_role_payment_gateway = WWPP_Wholesale_Role_Payment_Gateway::instance( array( 'WWPP_Wholesale_Roles' => $wwpp_wholesale_roles ) );
$wwpp_bootstrap = WWPP_Bootstrap::instance( array(
'WWPP_Wholesale_Roles' => $wwpp_wholesale_roles,
'WWPP_Wholesale_Role_Payment_Gateway' => $wwpp_wholesale_role_payment_gateway,
'WWPP_CURRENT_VERSION' => $wwpp::VERSION
) );
$wwpp_bootstrap->initialize_product_visibility_filter_meta();
}
add_action( 'pmxi_after_xml_import', 'wwpp_product_visibility_fix' );

Please note that this custom snippet is a filter for a function called 『pmxi_after_xml_import』. It is a function from WP All Import, which means that the code should run after the importing of your products.
If you』re using other third-party plugins, we suggest contacting the plugin author or ask a developer to provide further assistance regarding this snippet.

How to Remove Custom Fields from another Wholesale Registration Form

How to Remove Custom Fields from another Wholesale Registration Form

The WooCommerce Wholesale Lead Capture plugin allows multiple wholesale registration forms by the use of shortcodes.
However, all enabled standard and custom fields on the Wholesale Lead settings are applied to all wholesale registration forms. So if you want to remove certain fields from an individual registration form, you can use the custom snippet provided below.
add_filter('wwlc_registration_form_fields', function($fields) {
// Remove custom field on this page only
if( get_the_ID() == 1234 ) {
foreach( $fields as $key => $field ) {
// Target the Field ID of custom field
if( $field[ 'id' ] == 'wwlc_cf_example' )
unset( $fields[ $key ] );
}
}
return $fields;
} , 10 , 1);

In the example above, you need to replace the ID of 1234 to the Page ID of the wholesale registration page you want to remove the custom field on.
Next, the 『wwlc_cf_example』 string should be changed to match the field name you want to remove from that particular registration page.
You can go to WooCommerce > Settings > Wholesale Lead > Custom Fields, to check the Field ID of the custom field you want to remove.
Then put this on the functions.php file of your theme/child theme to apply the change to your Wholesale Registration Form.

How Can I Test Wholesale Pricing? I』m Logged In As Admin And Only See Retail Prices

How Can I Test Wholesale Pricing? I』m Logged In As Admin And Only See Retail Prices

One of the first things you need to do when setting up your wholesale portal is to create a wholesale test user so you can experience your site the way your users do.
It』s a good idea to set up a new user especially for testing your wholesale area and pricing. Administrators aren』t restricted in any way, but they still will not see the wholesale role pricing because this is for wholesale customers only.
You create a test user for testing your wholesale system by:

Login as admin and go to Users->Add New.
User another email address you own to create a new user and make sure you set the user role to 「Wholesale Customer」 or whichever role you want to test (note, you can add multiple roles with the WooCommerce Wholesale Prices Premium add-on plugin).
Open an Incognito/Private Browsing window (or use a different browser) so you can run two sessions at the same time.
Login with your new wholesale user, you can now use this for testing.

Create Wholesale Only Content With These Special Shortcodes

Create Wholesale Only Content With These Special Shortcodes

In the latest version of WooCommerce Wholesale Prices Premium we introduced several new shortcodes which allow you to show or hide content in any post, page or product or basically anywhere you can use shortcodes.
This is super powerful as you can imagine and leads to being able to show different product page content to wholesale customers, showing hidden information like links to wholesale only resources and more.
How To Use The Wholesale Only Content Shortcodes
To hide content from regular users but show it to wholesale customer use:
[wholesale_content]Here is my content that is only visible to any wholesale user[/wholesale_content]
Or if you want to do the opposite, that is hide content from wholesale users but show to everyone else simply:
[hide_from_wholesale]Content that any wholesale user should not see[/hide_from_wholesale]
You can also target specific wholesale roles with these shortcodes:
[wholesale_content role="wholesale_second_level,wholesale_third_level"]Here is my content that is only visible to the specified roles[/wholesale_content]
And target specific wholesale roles when hiding content too:
[hide_from_wholesale role="wholesale_second_level"]Content that is hidden from the second level wholesale role[/hide_from_wholesale]
We hope you have fun using these new shortcodes!

WWS License page is showing error 404 when switching to another tab

WWS License page is showing error 404 when switching to another tab

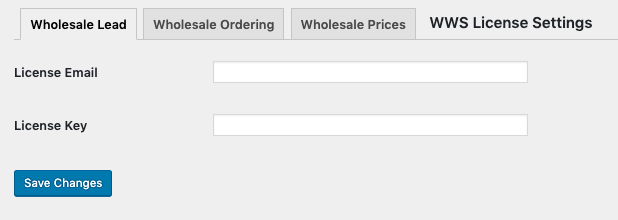
The license settings for all Wholesale Suite plugins can be found on Settings > WWS License. This page houses the three Wholesale Suite plugins where you can activate the licenses of each plugin named WooCommerce Wholesale Prices Premium, WooCommerce Wholesale Order Form and WooCommerce Wholesale Lead Capture.

If you』re having trouble switching to another tab and getting error 404 (Page not Found) this means that you』ve installed the Wholesale Suite plugins in a different root folder than the Site Address URL (WordPress > Settings > General).
In order to fix this, you』ll need to follow Method II (With URL change) from this WordPress guide about subdirectory:

Giving WordPress Its Own Directory

Javascript conflict with YITH WooCommerce Wishlist plugin

Javascript conflict with YITH WooCommerce Wishlist plugin

There is a javascript conflict with the YITH WooCommerce Wishlist plugin found on WordPress.org which causes an error on the WooCommerce Wholesale Order Form ordering page.
This occurs after the product is added to the cart and persists regardless of which style layout you are using.
Once the YITH WooCommerce Wishlist plugin is disabled, the issue appears to go away.
If you wish to keep using the two plugins together you can install the following workaround which removes the YITH script files on the Order Form page.
Just add this to your functions.php :
function dequeueYITHOnOrderPage() {
if (is_page('wholesale-page')) // adjust this to the slug of your wholesale ordering page, wholesale-page is the default
wp_dequeue_script( 'jquery-yith-wcwl' );
}

add_action('wp_enqueue_scripts', 'dequeueYITHOnOrderPage', 999);

How To Prevent Purchase If Wholesale Conditions Are Not Met

How To Prevent Purchase If Wholesale Conditions Are Not Met

Our WooCommerce Wholesale Prices Premium has a feature to set a minimum order requirement. If the wholesale customer doesn』t meet this requirement, there』ll be a notice for them to warn them about this because they won』t get the wholesale price for that order. 
If by chance your wholesale customer misses this, they will still be able to checkout with regular price. 
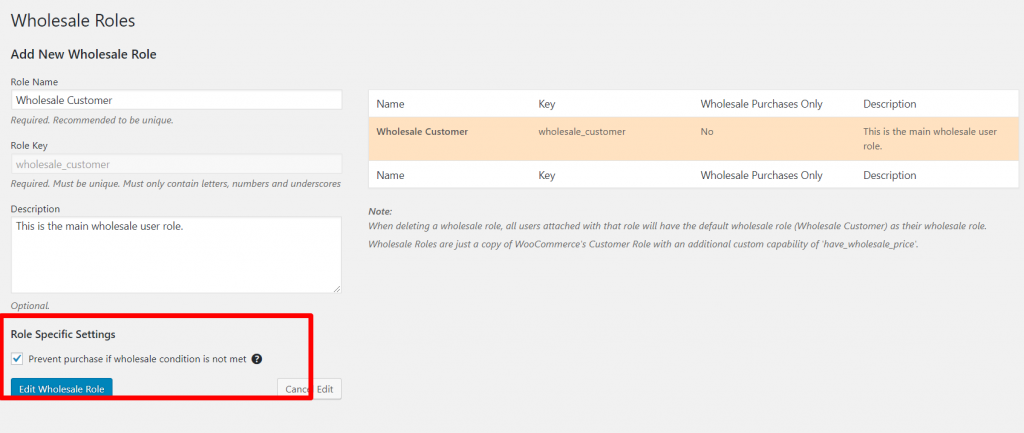
We also have an option to prevent purchases/check out if the wholesale customer hasn』t met the minimum order requirement. Since this is enabled per user role (not globally) you』ll find this on the wholesale roles page with the user』s role-specific settings.
To enable this, please navigate to WooCommerce > Wholesale Roles, then edit the Wholesale Customer and tick the 「Prevent purchase if wholesale condition is not met」 option. 

Is there a way for wholesale customers to sign up for an account and automatically get the wholesale role?

Is there a way for wholesale customers to sign up for an account and automatically get the wholesale role?

You can, of course, have your wholesale customers sign up via the built-in WooCommerce account registration but as you mentioned it means you have the admin headache of going in and changing the user role on those people』s accounts so they get access.
If you』re looking to streamline this process and make it a bit easier to recruit and manage your wholesalers you might want to take a look at our WooCommerce Wholesale Lead Capture plugin.
It lets you provide your wholesale customers with a special registration form and a special login form and also has user moderation built in so you can approve/deny people as they sign up.
All the emails are also customisable so it gives your incoming wholesale customers a really good experience.
And, it can also be set up to automatically apply the correct wholesale role that you choose.

Custom Redirections for Wholesale Registration Page

Custom Redirections for Wholesale Registration Page

Redirection for Multiple Wholesale Registration Pages
Since we』ve introduced Wholesale Registration shortcodes to create multiple registration forms, there have been some requests on how to redirect other registration forms to a different page.
By default, the Wholesale Registration page redirects to the Wholesale Thank You page found on your WooCommerce > Settings > Wholesale Lead > General. But by using the custom snippet below, you can change the URL of the redirection based on the Page ID of the Wholesale Registration page that you want to get redirected.
add_filter( 'wwlc_create_user_response_data', function( $response ) {
$url = wp_get_referer();
$page_id = url_to_postid( $url );

if( $page_id === 5213 ) {
if( $response[ 'status' ] == 'success' ) {
$response[ 'redirect' ] = 'https://facebook.com/';
}
}
return $response;
}, 99, 1 );
 
Redirection based on the value of the custom field
Another useful snippet that you can use is for redirecting the user after a successful registration to a specific page based on the value/option selected in your custom field (radio).
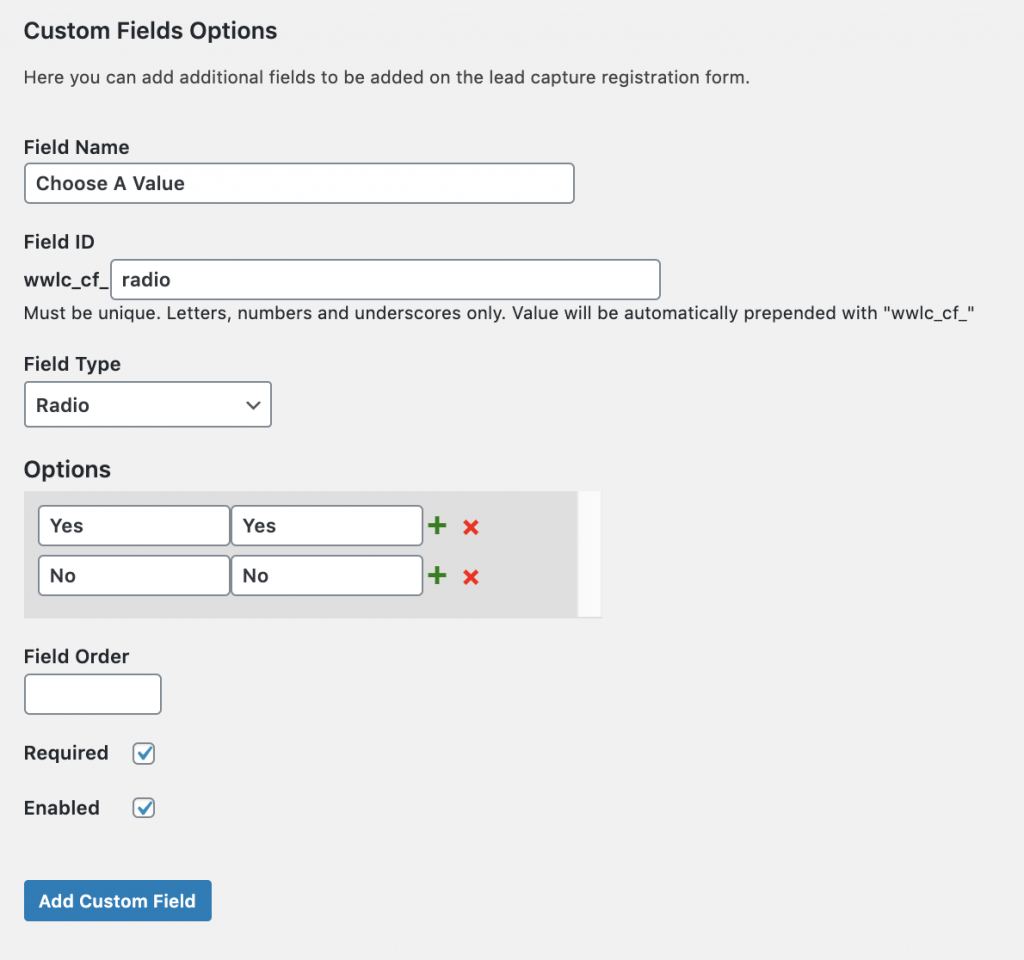
As an example, I have created wwlc_cf_radio in the WooCommerce > Settings > Wholesale Lead > Custom Fields.

function my_wwlc_register_custom_redirect( $response ) {

    if( $response[ 'status' ] == 'success' ) {
        $custom_field_val = get_user_meta( $response[ 'user_id' ] , 'wwlc_cf_radio' , true );
        if( $custom_field_val == 'Yes' )
            $response[ 'redirect' ] = 'https://wholesalesuiteplugins.com/';
    }
   
   return $response;

}

add_filter( 'wwlc_create_user_response_data', 'my_wwlc_register_custom_redirect', 99, 1 );
The snippet above will redirect the users who selected YES on the custom radio field on the Wholesale Registration page. Simply change the sample link in the snippet to your desired URL.
 
Redirect a Successful Registration based on the Wholesale Registration Page Language
Another redirection snippet that you can use is based on the language of the Wholesale Registration page.
The snippet below will check if the language is set to English (en_US) and it will redirect it to the URL provided.
If you wish to add more language redirection, simply add another if condition to check if the $lang variable is equal to the language the user is registering. Here』s the link where you can get the language code for the language used in WordPress. Afterward, feel free to change the respective URL for the language you want it to be redirected.
function my_wwlc_register_custom_redirect( $response ) {
$lang = get_locale();

if( $response[ 'status' ] == 'success' ) {
if ($lang=='en_US'){
$response[ 'redirect' ] = 'https://facebook.com/';
}
}
return $response;
}
add_filter( 'wwlc_create_user_response_data', 'my_wwlc_register_custom_redirect', 99, 1 );
To use the custom snippets provided above, simply put them on your theme/child theme』s functions.php to enable them to work on your site.
Please note that these custom snippets may require some coding background if you wish to further customize them.

How To Remove An Activated Site From Your License

How To Remove An Activated Site From Your License

You can view the list of your activated sites and remove any unwanted sites from your license by logging into your account on our website.
If you want to remove an activated site, you can simply go to your licenses page.
After logging in, go to the Licenses tab and you should be able to find the list of your activated sites. From there, you can now remove the activated sites from your license.
And if you want to register a new site, just simply activate your license on the site』s backed under Settings > WWS Settings.