How To Stop Wholesale Customers From Purchasing Until They Reach The Minimum RequirementsRunning a wholesale side to your business is a great way to handle large volume orders and reward your customers for buying in bigger quantities.
But we all know that sometimes you need to enforce certain rules for wholesale customers to ensure that they』re meeting the minimum requirements of getting this cheaper pricing rate.
That』s where minimum ordering amounts generally come in and companies typically handle this with a minimum order quantity on the products.
In WooCommerce Wholesale Prices Premium this can be applied in two ways:
1. A minimum order quantity requirement (set in the global settings) which is applied to the order as a whole – the combination of all items in the cart for that order (total items ordered).
 Minimum Order Requirements Global Settings (Click To Zoom)
2. Minimum product quantity & step restrictions applied via each individual product.
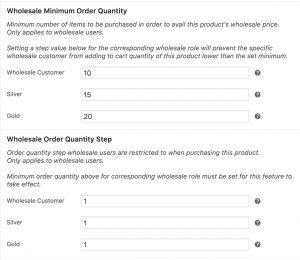 Wholesale Minimum Order Quantity & Wholesale Order Quantity Step Product Settings (Click To Zoom)
Wholesale customers can still order below the minimum quantity, however, wholesale price will not apply until they meet the minimum order requirements.
If you want to strictly implement the minimum order quantity for wholesale customers, you can set the product』s Wholesale Order Quantity Step to 1 to prevent ordering lower than the minimum in the Product page and enable the Role Specific Settings – Prevent purchase if wholesale condition is not met in the WooCommerce > Wholesale Roles settings to prevent them from checking out from cart.
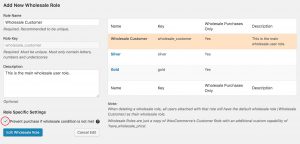 Role Specific Setting (Click To Zoom)
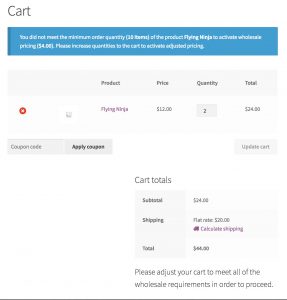 Cart warning if minimum orders are not met (Click To Zoom)
You can also use these in combination, however, both rules will then need to be satisfied:
Let』s illustrate with an example:
Global minimum order quantity restriction of 100
Product A with a minimum quantity of 20
Product B with no minimum quantity required
Fred is a wholesale customer and wants to make an order comprised of Product A and Product B.
He adds 10x Product A to his cart and 50x Product B to his cart.
Unfortunately, he doesn』t meet the minimum order restriction of 100 units, so this fails the test to see if he qualifies for wholesale pricing and he sees a notice on the cart to that effect.
Fred then increases his quantities to 120x Product B but he leaves 10x Product A.
The order now passes the first test but it fails the minimum quantity restriction of 20 for Product A and he sees a notice on the cart to that effect. Product B, however, WILL have wholesale pricing applied since the minimum quantity is 0 for that product and he has satisfied the global minimum order restriction of 100 units.
Fred now increases the quantity of Product A to 50x.
The order now passes both the global minimum order restriction of 100 units which enables wholesale pricing and now that he』s increased the quantity for Product A above 20 he also has satisfied that condition. Product B has already passed because there is no minimum required on that product.
He』s now super happy because he』s enjoying wholesale discounts on all of his order and the store owner is happy as well because he successfully boosted the value of the order making it more viable from a business perspective.


 Wholesale Order Form with HTML5 input
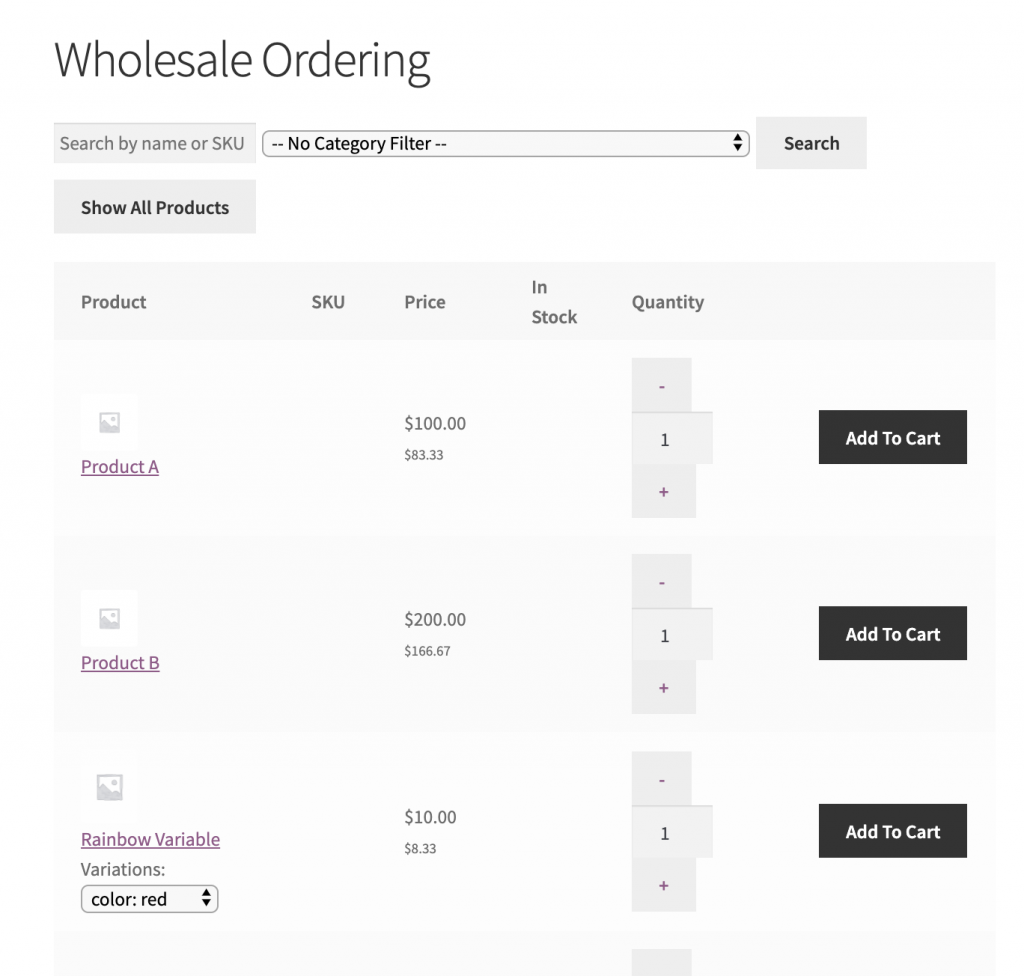 Wholesale Order Form Quantity Plus and Minus Buttons (This inherit』s your theme』s styling so please style accordingly)